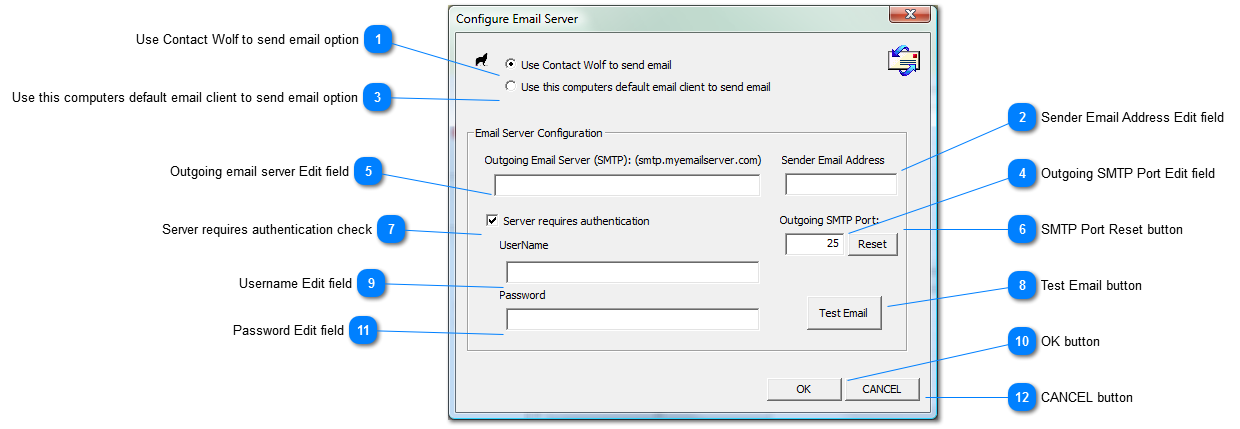
Use this computers default email client to send email option
Select this option if you prefer to use your computers email client to send email messages to TAGGED records. This option does not require the Email Server information to be entered since it simply sends the messages thru your computers default email client.
If using this option to send multiple email messages the other email addresses will be visible in the CC field of the messages.
Configures which Port is used to send email for the Outgoing server. We recommend keeping it on Port 25 which is the standard default Port on most computers.
This is usually an SMTP address such as smtp.myemailserver.com You may need to contact your ISP to determine your outgoing server address. If you have a functional email client on your computer you can usually find the smtp address in the email clients options.
If your server requires authentication (a username and password) click on the Server Requires Authentication option and place a check mark in the box so its selected.
Click on the TEST EMAIL button to send a test email to yourself. You will see a popup message that says "Message sent successfully" if you have the server information entered correctly. If you have the Contact Wolf Email Engine option enabled all email will now be sent from Contact Wolf using its built-in email engine.
Enter the UserName for the account on your email server. Normally your Email server is provided by your Internet Service provider (ISP). For example if you are using Comcast as your ISP you may need to call Comcast and find out your Outgoing SMTP address, UserName and Password to send email thru the ISP's server.